10 Most Popular DIY YouTube Channels to Follow in 2021

The reason that YouTube DIY videos have become so popular among different generations is that they are both entertaining and practical for different purposes. People may choose to watch a YouTube video for various reasons. For instance, they may just be looking for entertainment or may want to learn a new skill. DIY YouTube videos can meet the needs of many audiences on YouTube because they both entertain them and teach them a new thing. 

Here in this article, we will introduce the most popular DIY YouTube channels. So, keep on reading the article to get to know these channels and subscribe to any of them that you think is worth it. 

Best Creative YouTube Channels in 2021

So, let’s read about the best and most popular DIY YouTube videos in 2021. We would introduce these channels from the highest number of subscribers to the lowest:

#1: 5-Minute Crafts

Over 70 Million Subscribers

5-Minute Crafts is an ever-growing channel full of different fun DIY tricks using almost anything. Regardless of your age, you can always find something suitable on this channel. No matter if you are interested in a glue gun, slime, glitter, cooking, fruits, etc. there is a lot you still do not know that you can do with many materials. Here is an egg cooking video by 5-Minute Crafts:


#2: Troom Troom

Over 21 Million Subscribers

Troom Troom is a fun DIY channel that is famous for its use of various sharp and lively colors. You can find visually captivating DIY videos on this channel about pranks, home décor, cosmetics, makeup hacks, and various experiments. Troom Troom can easily capture your attention as it uses the colors and can teach you practical tricks. Here is a decor idea video by Troom Troom: 


#3: LaurDIY

Nearly 9 Million Subscribers

Lauren Riihimaki is known as the Queen of YouTube by Character Media. This girl shares DIY videos on almost any crafts. She is into sewing above all of her interests. So, if you have the same interest, this is the right channel for you to subscribe to. In addition to sewing, you can learn petting dogs on her YouTube channel. To give you a better image of the dominant atmosphere on her channel, we should say that teenagers and Gen Z members comprise a large portion of her subscribers. Here is how she sews an outfit for her dog using a sewing machine:


#4: Howcast

Over 8 Million Subscribers

Though there are about more or less 8 million subscribers for the Howcast channel on YouTube, videos on this channel have been viewed billions of times. Howcast channel is aimed at teaching different categories. There is a wide range of videos on different subjects one may face in their lives. So, it is indeed a large channel. You can find how-to videos, DIY creative videos, videos about kid raising tips, fitness videos, educational videos, and a lot of other useful videos on this channel. As these videos are made by experts in each category, you can make sure that what you watch is professional. Here is a fitness video by Howcast as an example: 

#5: Household Hacker

About 5 Million Subscribers

By watching Household Hacker videos, you can improve your household without having to spend a lot of money. The videos on this channel are easy to learn and quite entertaining. They are also practical and you can do what you learn using the ordinary material that you can find in your house. Therefore, you renew stuff without spending any money. From kitchen hacks, easy cooking recipes, to making cool tools, you can learn and enjoy on this channel. Here is a video on toilet paper splitting machine by Household Hackers:

#6: Scotty Kilmer

More than 3.5 Million Subscribers

Car fixing is a challenge for some and is a fun hobby for some others. Scotty Kilmer’s channel is suitable for both groups because it shows the functionality of cars and how one can fix a car in case of a mechanical issue. Scotty Kilmer gives you easy and fun guides and makes the process of car fixing an enjoyable one. Watching his videos teach you how to fix your car, design any model, mend, and restore automobiles. Here is a video by Scotty Kilmer on 5 things you should never do on an automatic transmission car:

#7: I Like To Make Stuff

About 3 Million Subscribers

If you are into creating anything in a house from living room decorations to kitchen tools, I Like to Make Stuff is the right channel to subscribe to on YouTube. Bob is the owner of this channel and is a normal person which means that you do not have to own special and professional skills to make DIY things that he teaches. Things you can learn on this channel are woodworking, metalworking, electronics, and even 3D printing. Here is an introductory video by Bob:

#8: Kipkay

About 2.5 Million Subscribers

Established in 2006 by Kip Kedersha, the owner of the channel, Kipkay shares videos on DIY projects that receive more than 700 million views. The main concept of the channel is to teach how to restore the old tools. Moreover, Kip enjoys sharing videos in which he tries new gadgets and does some interesting unboxings. Here is one of his videos:

#9: Make:

Over 1.60 Million Subscribers

Make: is another verified channel on YouTube that is mainly related to technology. You can learn many electronic DIY tips and have fun with them. You can repair broken tools, create new tools, and learn their functions through the tips in the videos. Make: is the right channel for you to subscribe to if you have a thing for electronic stuff. Here is a DIY porch light video by Make:


#10: Steve Ramsay

Over 1.50 Million Subscribers 

One thing that home decor lovers like in DIY projects are to watch how working with wood and screws can lead to the creation of a wonderful masterpiece as a decoration ornament. If you learn woodworking, then designing your house would no longer need a designer with a high salary. You can easily create beautiful things at a very low cost just by watching some DIY videos by Steve Ramsay. The things that he teaches in his videos require economical materials so they can be budget-friendly. Here is a video from Steve Ramsay’s channel:


Conclusion

The above mentioned DIY channels are the most popular videos on YouTube. Regarding your interests and needs, you can choose any of these channels and subscribe to them. So, you can watch a lot of different videos and learn new things. In addition, if you want to have a DIY account on Instagram, you can share these videos and use mass follow on Instagram to grow your account. Enjoy!


Bio

I am Parichehr Parsi, a born writer, and a freelance copywriter in the fields of travel, fashion, and Instagram marketing. I currently write for SocialPros, Realtormate, and online magazines in Italy and I love reading, writing, and researching. Find me on LinkedIn!

What is Paint Finisher?

After choosing the perfect color for a room or furniture, another important decision needs to be made – choosing a paint finisher. With many types of paint finishes to choose from, it would be best to know more about them so that you can choose the perfect one for you be it your normal chemical/oil based or a more sustainable version.. This article will discuss paint finishers, some things to consider, and their types.


Some Things to Consider when Choosing a Paint Finisher

  • Sheen – paint finishers have varying amounts of shine. The variant you choose depends on the look you are going for.
  • Maintenance – certain paint finisher types require less maintenance than the others. Some can even be cleaned using only common household cleaners.
  • Concealing Power – some people use paint finishers to hide imperfections these come in small “touch up” tins. The other types of finishers provide better coverage and come in your common paint tin.

Types of Paint Finisher

When choosing a paint finisher, you usually have six options to choose from. Each one of them has a certain characteristic that makes them stand out from the rest. Let us explore these paint finisher types:

Matte Finisher

Sometimes called a flat finisher, this is commonly chosen for ceilings and interior walls. The use of this type of finish is often used on modern trendy furniture like these display cabinets from Homes Direct 365. It is popular because it provides almost no shine, allowing your design choices to be focused on. Matte finishers will surely work well with most rooms in your home.

This finisher is also good at concealing imperfections such as cracks and chips on your walls. Due to this, matte finishers make good options for older homes that have experienced wear and tear.

For cleaning marks or handprints, things may get difficult due to the finisher’s flatness. It is often better to opt for a touch-up to quickly get rid of these marks. This is also why having a spare matte finisher on hand is highly advised.

Matte-Enamel Finisher

Just like the previously mentioned matte variation above, this finisher comes with little-to-no shine and a flat finish. However, the altered chemical makeup of matte-enamel finisher forms a layer of film on the surface as it dries, making cleanups easier.

The durability provided by this finisher makes it a good option for high-traffic areas including bathrooms and kitchens. When looking for this type of finisher, you are likely to encounter products labeled as washable, meaning they can withstand light scrubbings using soap and water.

Eggshell Finisher

You will find eggshell finishers interesting if you prefer some shine in your finish and a vibrant color. To get an idea of how shiny it is, try picturing the outside of an eggshell. This is remarkably like the results you’ll get.

An Eggshell finisher is great for busy homes due to its easy-to-clean surface. With just a slight amount of sheer, you do not have to deal with the luster that comes with glossy finishes. It was also a frequent color in Georgian kitchens back in the day.

One downside of this finisher is the probability of cracks and imperfections in the future. To better avoid this, it is recommended to patch up your walls first before using this type of finisher. Additionally, brushing in the same direction helps in the formation of lines as the paint dries.

Satin Finisher

Many homeowners prefer satin finishers due to the warm and velvety feel they provide. This type of finisher does exceptionally well for framing elements like trims, moldings, and doorways.

Moreover, its outstanding durability also makes it an ideal choice for high-traffic areas such as hallways, bathrooms, and kitchens. Satin finishers are chip-resistant and easy to clean as well.

When it comes to its limitations, one of them is the possibility of brushstrokes appearing. Touch-ups are not an option if this ever happens. Therefore, it is essential to be extra careful during the application process to avoid this from happening.


Semi-Gloss Finisher

This finisher type is comparable to the previously mentioned satin variant. The only difference is the extra sheen it provides, making your chosen shade appear darker due to more light bouncing off.

Semi-gloss finishers make good choices for rooms that need frequent cleaning. The shine it provides is also perfect for emphasizing certain design elements, such as fireplace mantels, kitchen cabinets, and banisters.


Gloss Finisher

Sometimes referred to as high-gloss finisher, the highly reflective surface gloss finishers make it a good choice for furniture and trims. This finisher can also be used to add glamour into your home. If you desire to ramp up the glamorous aesthetics inside your home, feel free to go big and coat your chosen surface twice.


Conclusion

Choosing a paint finisher is just as important as choosing the perfect shade for your home. Several factors are usually considered when choosing a paint finisher, including sheen, maintenance, and concealing power.

Understanding each finisher type’s characteristics and considering your needs and preferences are both necessary in choosing the perfect variant for you. If you do all these steps, you will find your ideal paint finisher in no time.

Family Friendly Ways to Be More Sustainable 

Being sustainable can be difficult. We all want to help the environment, but the world is so advanced that being sustainable no longer feels natural. These days most of the businesses are sustainable, or they are trying to be. 

However, we all need to play a part in helping the environment, and that means being more sustainable. In fact, being sustainable can be fun, if you do it as a family. Working together and finding creative ways to use what you have can be an exciting adventure. So, here are some fun and family-friendly ways to be more sustainable. 

Grow your own veg

Store bought fruit and veg can be full of chemicals. Often, the items that you buy are grown abroad and shipped over. This isn’t good for the environment. But, growing your own fruit and veg is, and it can be super fun. Simply find a patch in your garden that gets plenty of suns and get digging. It can be incredibly cathartic and obsessive. Just be aware of any chemicals you use in your own garden. Herbicides, such as roundup can be harmful to humans and cause lifelong health problems (why is round up still being sold? It’s a good question. Click the link to find out more). Soon, your garden will be full of life and delicious veg for all the family. 

Arts and crafts 

Everyone loves arts and crafts. Even the least creative person can’t resist a little glue and glitter. But how are arts and crafts helping you to be sustainable? Well, instead of going to a store for new clothes, you can make changes to the clothes you currently have, making them feel new. Instead of buying a new outfit for one occasion and never wearing it again, you’ll be excited to show off your amazing sewing skills. Check out these winter crafts for more ideas. 

Water challenges

We all use far too much water. Long hot baths in the evening can be so tempting, yet baths can use up to seven times more water than a quick shower. So, challenge your kids to a water use competition. Who can use less water in a week? The winner gets a prize!

Car boot sales

Families tend to throw lots of things away. Kids grow out of their clothes quickly, and their interests are ever changing. However, it’s important to show your kids the impact of throwing things in the landfill. This is terrible for the environment, as most plastics take many years to decompose. So, instead of throwing out old toys and clothes, start going to car boot sales where your kids will see other families enjoying your used items. You can pick up some bargains for them, too.  

7 Home Exterior Updates for Maximum Curb Appeal

When you’re trying to improve your home’s look, you shouldn’t only think about how it looks inside. It would help if you remembered to update and improve upon your curb appeal too.

With the right home exterior updates, you’ll even be able to enhance the value of your property. You can see some examples of this in the online gallery of these Happy Valley, Oregon landscapers.

If you’re considering investing more in your home’s curb appeal, there are several updates worth an investment. Try out seven exterior home updates in this article below.

Start with the necessary clean up

Before you do any significant updates and improvements upon your home’s curb appeal, the first step is to clean up your house’s exterior.

Sometimes, people think that they don’t like how the exterior of their home looks, but after a good cleaning, they find that few, if any, change about it at all.

A clean up doesn’t only involve getting rid of dirt. It also includes the essential maintenance of the current things around the outside of your home.

For example, you can trim the bushes and other plants outside your home that are getting a bit out of hand. You can also touch up the pain trimmings around your home. Don’t forget to mow your lawn.

This first step is essential because it’ll show you which aspects of your home need more of an update and which ones are fine.

Revamp your landscape

When people think about improving their curb appeal, their landscaping is the first thing that they believe in developing.

When you neglect your landscaping, it can make your home look older and more worn out. If you don’t trim your greeneries often, they can overgrow, which can add that neglected look to your home.

Aside from the general maintenance of your landscaping, you should consider upgrading it too. If you have the budget for it, you can also spend some money by improving the walkway leading up to the front door.

Replace the exterior finish

When people think of improving their curb appeal, often the first thing that comes to mind is the landscaping.

Although that’s a significant part of how your curb appeal looks, there are also other parts outside your home that could enjoy a revamping.

One such thing would be the exterior finish of your home. There are plenty of ways you can replace or revamp your exterior finish.

For example, house recladding in Auckland is a popular way to improve people’s homes’ surface finish. Not only are you changing the way that your house looks in a significant manner, but you’re also investing in the exterior protection for your home.

There are all sorts of recladding options available for you, so you should weigh each type of recladding material.

Place some outdoor lights

Something as simple as lighting can change how they look and feel of a place will be. When it comes to outdoor lights, your priority is how it makes your house look when it’s nighttime. Thus, you have to be strategic with your placement.

There are all sorts of outdoor lights out there, each with a different purpose, effect, and lighting method. Knowing the exact way that each outdoor lighting fixture works will help you figure out where it’s best to place them.

Besides accentuating your home’s exterior with light and pieces of furniture, you should ensure that your home’s number sign is visible. That way, guests will have an easier time looking for your home if you have a dinner party.

Swap your roof shingles

If you’re looking to make significant upgrades to your curb appeal, you’re going to have a budget. If you’re willing to get a relatively expensive update in your home, you should spend that on your roof shingles.

When it comes to the colors, you should be deliberate about the colors of your roof shingles. It’s much better to get darker roof shingles, especially if you need to neutralize your home color.

Consider switching out your windows

Replacing your windows is a step that few people take, but it can update your home’s exterior. When choosing to replace your windows, make sure that you take the entirety of your home’s design in mind.

If you have a period home, you need to make sure that your windows match that theme. Otherwise, it might feel like a mismatch.

Create stylish hardscape

Besides landscapes, you also have the option of improving upon the hardscapes around the exterior of your home.

Your hardscapes are things like the walkways leading up to the front door, the driveway, fountains, etc.

Creating a consistent style between your hardscapes will add a sense of structure to the design of your curb appeal.

Over to You

From the smallest changes to the most significant improvements, updating your home’s exterior can have massive effects on the appeal of your home.

Stick to a theme and think about how each element of your home’s exterior plays into one another.

Next time you find yourself fiending for a change in your home, consider updating your curb appeal with the help of these home exterior upgrades.

How to Make Pandoro Cake at Home?

Have you ever heard of pandoro Italian cake? If no, then you will be surprised to know this Italian cake is the yellow and soft leavened product that is eaten with cream or alone. There are two ways to make the cake: One which is a simple one and another is the traditional one that requires a lot of effort to make.

If you don’t like making the cake in your home, then you can buy pandoro cake online from various websites. If we talk about the history of this Italian cake, then you will be amazed to know they have their origin in Northern Italy. This cake was served in the home of rich people by the name of ‘Pan de Oro’.

While making the pandoro, you have to decide which type of yeast will make the best bread. You can use the fresh yeast so that the pandoro made will be of good quality as well as taste. You may think that the pandoro made in the home will not taste like the one which you bought from the market. If you doubt that ten pandoro made in the house is too dry inside then, you get the pandoro cake online from any website.


Ingredients Needed to Make 2.2 Pound Pandoro Cake

For Poolish

  • Manitoba Flour – 2 ounces
  • Fresh Yeast – 0.18 ounce
  • Water – 2 tablespoon

For First Dough

  • Poolish
  • Egg – 1 whole
  • Manitoba Flour – 4 ounces
  • Fresh Yeast – 0.18 ounce
  • Caster Sugar – 0.04 cups

Second Dough

  • Manitoba Flour – 9 ounces
  • Eggs – 2
  • Lemon Peel – ½ grated
  • Egg Yolks – 1 ounce
  • Caster Sugar – 5/8 cups
  • Soft Butter – 9 tablespoons
  • Honey – ¼ tablespoon
  • Vanilla Pod – 1

Cooking Instruction

You need to prepare the polish by mixing all the ingredients like yeast, Manitoba flour and water the evening before you prepare the pandoro Italian Cake. You need to mix the mixture till you get the homogenous loaf and then place the dough in the bowl for letting it rise overnight.

Next day, you need to start by making the first dough by using the polish, Manitoba flour, sugar, and fresh yeast.

Start kneading then add egg in the mixture. Mix the ingredients till the time it is blended perfectly.

You need to place this dough on the bowl and cover it with the paper. Put the bowl in a hot oven to let it rise, or you can leave the dough for 4-5 hours so that it can rise.

The dough will be double in volume if you either keep it in the oven or leave it for 4-5 hours in the open.

Once the double becomes double in size, you can put it in the stand mixer. Now add honey, seeds of the vanilla pod, Manitoba flour, sugar and peel of the half lemon.

You need to knead the mixture in the low temperature and then add egg yolks and eggs in it. Make sure the mixture is incorporated perfectly fine.

Now you need to add butter by cutting it into small cubes in the mixture. When all the butter is incorporated perfectly fine in the mixture, you can transfer the dough to the work surface that is non-floured.

You have to make folds to the mixture and then start making the ball of smooth dough. You need to place the dough inside the buttered and floured mold.

You need to place the tin inside the oven with the light for 8-10 hours, or you can keep it at the room temperature for 10-12 hours so that it can rise.

Now cook the pandoro at 140°C by placing the bowl full of water at the bottom of the oven to maintain the humidity. This will help in not only cooking the pandora cake but also helps to let it not dry.

When the pandoro is golden on the top, then you can be sure it is ready. Remove the Italian cake from your oven and let it cool. You have to remove the cake from the mold and then cover it with icing sugar.

Be it any occasion or Christmas preparing pandoro cake at home will be the best option so as to enhance the happiness by eating this golden bread.

The Best Window Treatment Ideas: Top 6 Trends to Follow

Make this 2020 the new year you start shedding light into your home with newer window treatments. Whether it’s to give your windows a facelift or purchase new curtains, something’s got to change for the better.

Even the smallest alterations can spruce up your rooms! But where can you start? Read on to find out the top six window treatment trends you can follow today!


1. Home Renovation to Welcome the New

I’m sure you’ve watched home improvement shows at least once in your life, and that you, or someone you know, is addicted to it!

The old home restoration trend goes beyond our favorite shows and will continue in many homeowners this 2020. While some renovations start to modernize, others will want to stick with the older home’s foundational design, utilizing what they have at home to make into something new.

You can incorporate traditional window treatments such as box, pencil, or pinch pleat curtains. These are perfect for older homes.


2. Open Floor Plans For More Light

Open floor plans are already becoming very popular because of how it adds flexible space, making a home look bigger. It also adds in more light and a nice view of your garden or backyard for a more positive ambiance.

You can embrace the open space and let even more light in by adding lightweight window treatments and pair it with breeze, open curtains without any blinds or sheers. This accentuates a good view while having a home look even brighter and more open.


3. Palettes Go Coastal

Did you know that Classic Blue is Pantone’s Color of the Year this 2020?

That’s why it’s time to usher in coastal-inspired colors, such as blues, crisp whites, and/or fresh greens! You can do this with your window treatments as well, which can make your home look stylish and trendy.

For those who have the neutral decor in their home, opt for a blue accent in your window treatments, accessories, and pillows. You can even opt for trendy patterns while matching the color trend, whether you want stripes, plaids, florals, or whatever design you want to achieve. This will give the area a peaceful and tranquil vibe while connecting all parts of your room and personality together.

It isn’t just the curtains and blinds to think about, but your curtain rods as well. Pair your coastal-colored window treatments with steel hardware, which is becoming bigger than ever. The curtains will embellish the simple and sleek rods, so look into bronze, nickel, or chrome materials that will give your windows a significant upgrade. 


4. Shutters Start to Gain Popularity

Blind products are beginning to grow in popularity, and it’s going pretty quickly! Blinds and shutters offer classic style and more privacy to a home, as well as shade during the hot, sunny days. However, shutters alone can have your room look a bit cold. 

Soften the look of the shutters by adding drapes or curtains, with your rods long enough to clear your shutters, easily opening and closing it. The curtains or drapes won’t only add design and color, but more privacy as needed!

Extra tip for those who want shutters: If you want wood plantation shutters but are on a budget, go for 2-inch wood blinds!


5. Rattan For Added Texture


Rattan and wicker furniture was once a trend that faded out but is now coming back this year. The all-natural and eco-friendly look adds more warmth and beauty to a home, having you feel like you’re away from home and in the tropics.

If you want to try this trend, invest in woven wood shades in bamboo or rattan for the textured and casual look. You can choose between dozens of colors and weaves to suit your preference! For those with a more traditional style, add contrasting binding tape to Roman shades, which adds formality.

Note that rattan and woven shades are usually see-through, depending on its weave. If you don’t want liners (these block-like completely and are visible from the outside of your home), opt for curtains over the shades, adding privacy and some softness.


6. We Go High-Tech With Our Curtains and Blinds

This is an exciting new addition to this 2020’s trends that we haven’t seen from previous years. If you have a device-activated home, you can invest in motorized blinds or curtains, the latest home technology rising in popularity today.

Activate the window treatments using a remote control, your smartphone, or your home devices like Alexa and Google! While enticing, the downfall is its cost, which can go around $300 to $1,000 per window, depending on the size and window treatment type you want. This doesn’t include special hardware and installation fees!

But if you have the budget, then it’s time to give your entire home an upgrade, including the windows. No need to walk up to them to draw curtains out or cover your windows anymore!

For those who don’t have the budget, not to worry. You can simplify the function and look of your blinds by investing in cordless lifts from Shuttterup Brisbane Blinds. These window treatments are easy to use and are a safe choice for children’s rooms and nurseries. Furthermore, they give the windows a clean and modern look.

So if you want to give your windows a new look, don’t wait any longer and try any of these treatment ideas today.

Why it Is Important to Get Your Air Conditioner Service Time to Time

Maintaining your air conditioner can be a bit of a pain. There are many pieces of equipment within the unit that require cleaning like the filters, coils, and fins. So it’s understandable to want to procrastinate till it slows up or starts making a weird sound. However, there are several reasons you should consider and also take action to service it from time to time. In this article, we’re going to be giving you six solid reasons to schedule AC maintenances in your calendar. So let’s get started.

At the same time, it might also be worthwhile investing in a home warranty plan. Home warranty plans are an excellent way to cover the cost of any maintenance or repairs for the systems and appliances in your home. Plus, whether you live in California, Texas, or Colorado, there is almost always a suitable home warranty plan for your needs! If you would like further information about home warranty plans you can check here to take a look at the First American website. If you want the best window-mounted AC unit, then check out this page for the best window coolers.

Safeguards vital equipment

Replacing an air conditioner can be a costly endeavor to undertake. However, you don’t have to budget for this high need when you service your AC regularly. You might find it interesting that HVAC professionals agree that regular servicing can prevent you from replacing your AC so quickly. Why does this happen, you ask? Well, regular servicing reduces the risk of your unit suddenly acting up.

Energy savings add up

An essential component of checking up on your unit includes cleaning the blades, cooling the coils, monitoring the coolant, and other equipment. You’ll find that frequently checking up on the various parts that make your AC and ensure they are always at full capacity. That means nothing is overheating or overworking just to keep you fresh in the summer. So in that manner, full size can easily translate to energy efficiency. Think of all the money you could save on electric bills with an AC that functions at optimum capacity. It’s quite a bit in the long run.

Extends your air conditioner’s lifespan

As earlier mentioned already, frequent check-ups will protect and prevent vital parts of your AC from breaking down. Not forever, obviously, as all machines eventually break down after sustaining years of wear and tear. On average, air conditioners with regular check-ups will last a lot longer than their counterparts with little to no servicing. That’s true even when they are the same type and have the same manufacturer. It’s normal for blockages or similar faults to build up over time and gradually reduce inefficiency if you don’t look into it. 

Filters your air better

No matter what kind of AC unit you use, blockages will occur, and filters will get dirty. However, when servicing your air conditioner, you can’t help but get your filters cleaned out. Filters are an essential part of our units as they are an integral part of the cooling system and ensure the air is clean. Dirty filters will most definitely do a worse job than clean filters. They even reduce air quality as a whole because of their diminished efficiency. So asides reducing the overall cooling effect of the air conditioner, they end up triggering allergies and other respiratory symptoms.

Maintains the warranty on your air conditioner

It’s not uncommon for air conditioners to come with warranties. Although how long it extends is at the discretion of the brand and manufacturer. You’ll find that most of them will come in at about 1-2 years. But did you know that sometimes warranties are considered void? One of the most popular reasons is an AC unit that is poorly maintained. So yes, the problem with a relatively new AC malfunctioning might have nothing to do with your maintenance, it is still virtually impossible to prove that you haven’t been servicing it often enough in the first place. Hence, irregular servicing of your air conditioner can cost you your warranty. That can be a costly way for you to learn the importance of a check-up.

Gives you comfort and peace of mind

So far, we’ve talked about how ACs functioning at optimal capacity can ensure you breathe in cleaner air and save more money. We’ve also highlighted that it can be an effective way to ensure you get the value of your warranty. All those reasons combined are sure to give anyone the comfort to be at peace. Your home should always be a safe zone. An air conditioner that doesn’t leave you stranded due to overwork in during summer is undoubtedly more convenient than one continually breaking down. Plus, cleaner filters mean you’re not recycling allergens and debris, which can trigger allergies and other complications. Going through the trouble of servicing your AC often can save you a lot of stress later on.

Conclusion

So there they are—six solid reasons for you to book an appointment to have your air conditioner serviced right now. We sincerely hope you found all the reasons convincing enough. So while getting a frequent check-up for your unit is essential, finding the right electrician to do it is also vital. You’ll want to look around your vicinity for services like Brad Gall Brisbane Electrician that make cleaning up and proper care of your property a priority.

How to Unclog Your Drains Without Dangerous Chemicals

Sometimes it happens that our drains get clogged. The water drains slowly and it can sometimes have a bad smell. It leaves us with a number of problems like not being able to use the sinks, bath or toilet. This situation usually sends us running for a bottle of chemicals for unclogging the drain. It is one of the most common methods for cleaning the drains. But, it’s also one of the very dangerous ways of resolving this problem. These chemicals are caustic, meaning they can damage your skin and eyes, and they can damage certain types of pipes. But, there are many ways with which you can unclog the drains naturally, without using dangerous chemicals. Read on to find out what they are.

Baking Soda and Vinegar

These are the two simple ingredients you probably already have in your home, and that don’t cost much. They create a chemical reaction because the soda is the base and vinegar is an acid. When you mix them together, a chemical reaction happens that will bubble and eat through the clogs. To unclog the drain using this method pour ½ cup of baking soda down the drain and ½ cup of vinegar after that. Plug the drain and leave it in for an hour. After the hour, pour a pot of boiling water down the drain. Continue pouring water until the drain is unclogged.

Dish Soap and Hot Water

If you know your drain is clogged by grease, a good method is to use your regular dish soap and hot water to unclog it. To use this method, pour a good amount of dish soap down the drain. After this slowly pour a pot of boiling water down the drain. This should break up any grease clogs in your drain. This method should be done once a week to prevent clogs.

Hydrogen Peroxide

Another method of unclogging your drains with ingredients you already have in your home is using hydrogen peroxide. It’s good for disinfecting and can be great for unclogging your drains. Mix a cup of hydrogen peroxide with a tablespoon of baking soda and pour it down the drain. Let it foam and it should break up any clog in your drain.

Baking Soda and Salt

Another mixture for unclogging your drains that involves baking soda is adding salt to the mixture. Mix about half a cup of soda and half a cup of salt and pour it down the drain. It would be best to leave it overnight, or at least an hour. When the proper amount of time has passed, pour down a boiling pot of water and your drain should be cleared out.

Professional Help

If you have tried everything and your drain is still clogged, consider hiring professional plumbers that can solve your problem. Hiring plumbers that have all the right tools and don’t use harsh chemicals for unclogging blocked drains can be a lifesaver. They can solve your problem very quickly and efficiently. Not every clog is possible for a do-it-yourself unclogging, so save yourself the hassle and frustration. Another reason for hiring professionals is that having clogged drains increases the possibility for your pipes bursting and adding to the problem and whole cost of the operation.

Wire hanger

If the clog is persistent, it may be better to use a physical approach to the problem. Everyone has a wire hanger in their home, and it can be the perfect tool for unclogging the drains in your home. Take the wire hanger and straighten it as much as you can and then bend one ned to create a hook. Remove the drain cover and start fishing around. The hook of the hanger will catch hair and any big stuff that is clogging your drain. Try not to push the gunk further in. Have a bag to discard everything you pull out. When you are finished, run hot water and everything should be working nicely after.

Plunger

Plungers are one of the tools for unclogging drains and toilets that first come to mind. They are fairly simple to use, and you can do this very quickly. There are two types of plungers, one for the toilet and one for sinks. The toilet one is bigger and usually has a black cup. The plungers with shallow cups are for sinks and tubs. In order to use the plunger and for it to work, there should be water covering the drain. Place the plunger over the drain and push until it makes a vacuum seal over the drain. Grasp the handle and pump the plunger up and down quickly a couple of times. Pull it out and see if the drain has opened. If it’s necessary, repeat the process until the drain is opened.

If you have successfully unclogged your drains, there are steps you can take to prevent them from getting clogged up again. Swap out your normal sink stopper for a one that prevents any unwanted materials from going down the drain. Clean your drains regularly with baking soda and hot water. If you follow this advice, you won’t have any drain problems for a long time.

5 Essential Scrapbook Embellishments

Are you looking for the 5 essential scrapbook embellishments? Would you like to invest in a good quality scrapbook kit that won’t break the bank? We’ve got the answers to your questions right here.

Scrapbooking or memory keeping has been a popular crafting hobby for quite some time now. Even with the rise of social media and technology, most people still prefer to document their precious memories using paper, stamps, stickers, and other scrapbook embellishments.

If you are new to scrapbooking, you might not be familiar with the essential and must-have scrapbook supplies. This post will help you figure out which scrapbook embellishments are necessary and which scrapbook it will suit your needs. Without further ado, here are the 5 essential scrapbook embellishments that you must have right now.


Paper, Paper, and more Paper!


When it comes to scrapbooking, it is a no-brainer that you need PAPER. Everything starts with a blank piece of paper – whether it’s a plain white paper, a colored or textured paper, or a patterned paper. Without paper, you pretty much won’t be able to create anything. It is one of the basic scrapbooking supplies. However, it can also be used as a scrapbook embellishment.


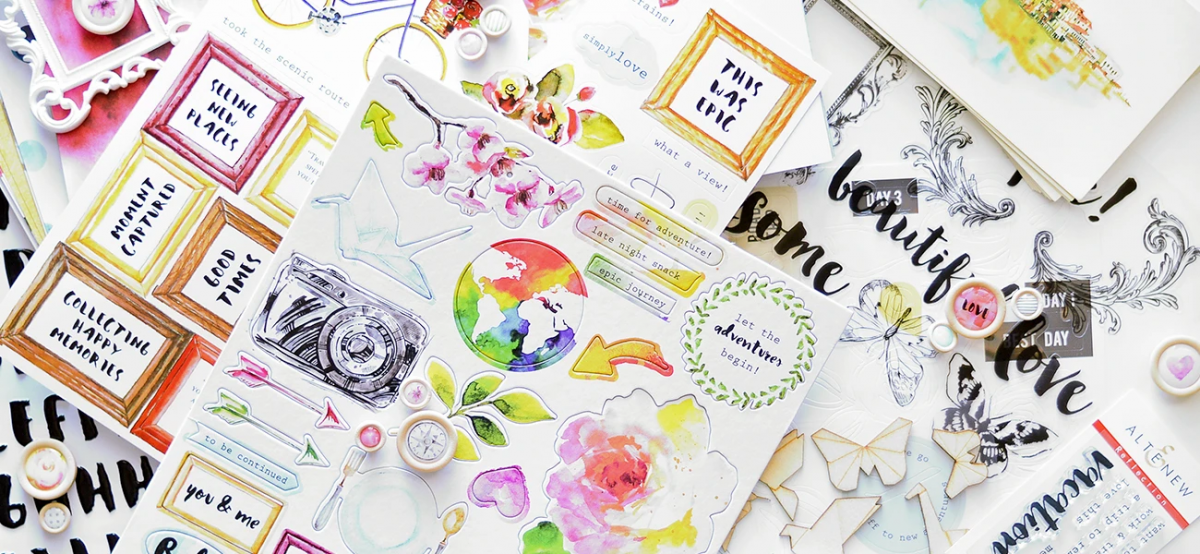
Scrapbook paper comes in all shapes, sizes, colors, and designs. Patterned or designer paper usually have, well, patterns and images that you can fussy cut and adhere to your scrapbook page. This will save you the trouble of looking for images or stickers for your page. You may also create your own scrapbook embellishment by using colored or textured paper to die cut your stamped images!


Stickers


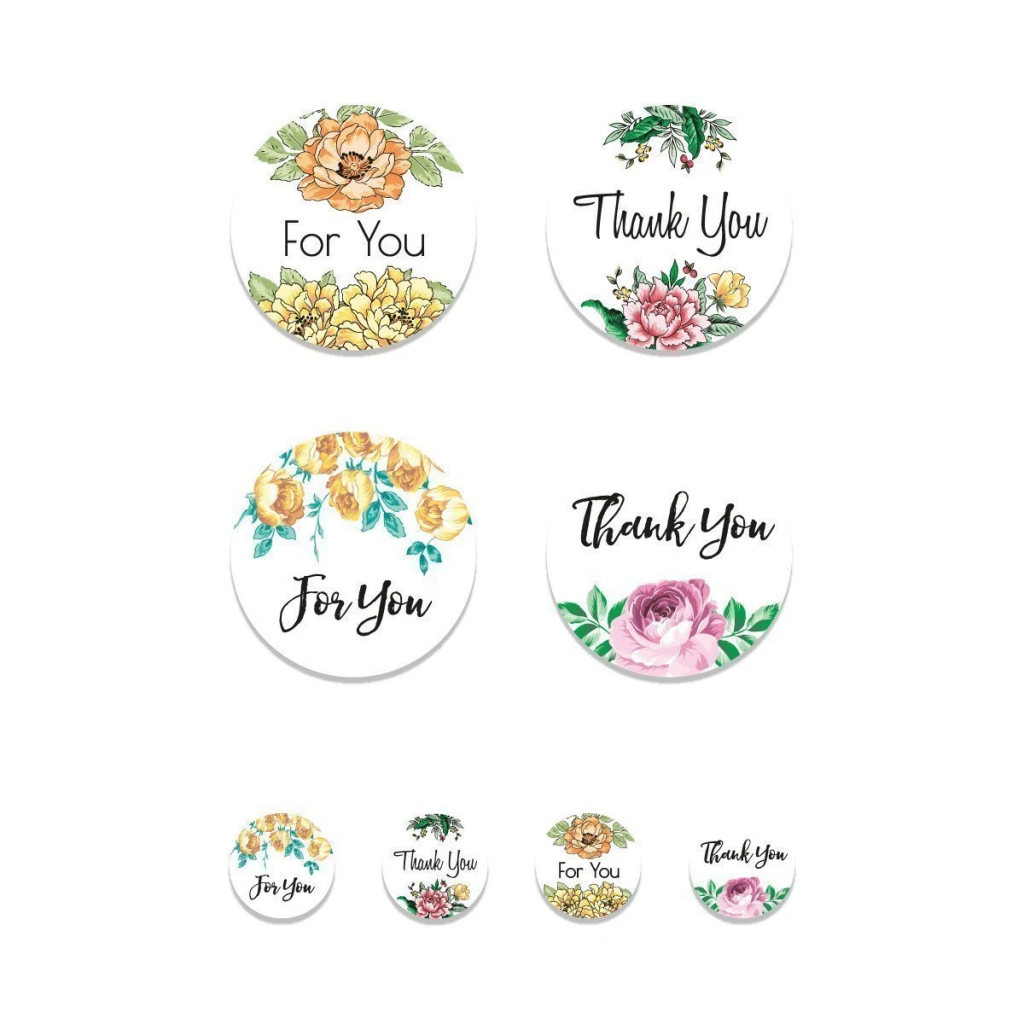
Obviously, stickers are absolute must-haves in your scrapbook kit. Whether it’s a chipboard sticker, a clear sticker, or a die-cut sticker, stickers will be your new best friend when you start with your memory keeping journey.

Collecting unique and versatile stickers is advisable especially if you tend to document various events and occasions in your life. This will help you create scrapbook pages easily without searching your scrapbook kit for the appropriate sticker. Make sure you don’t go overboard with your stickers though. You don’t want your scrapbook page to appear too heavy on the eyes.


Alphabet Stickers


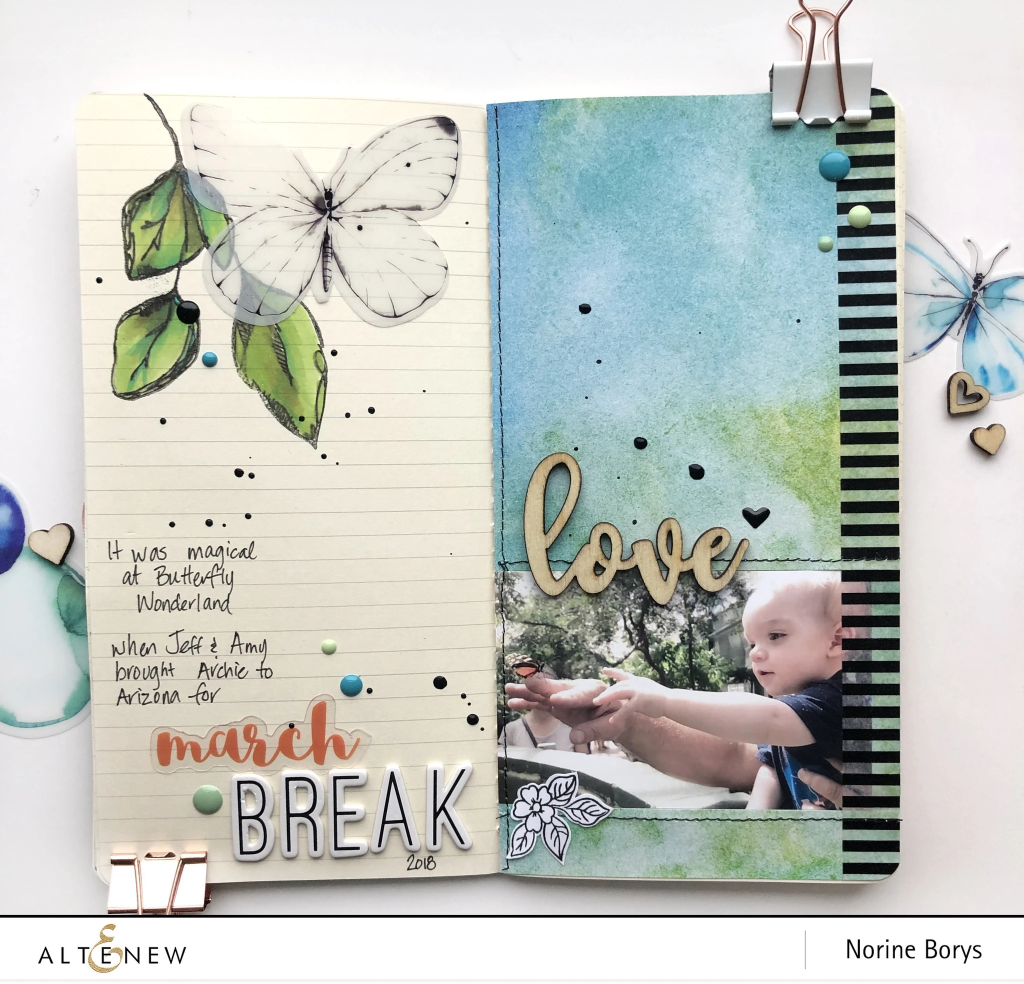
Having alphabet stickers on hand is a must when it comes to scrapbooking. While most scrapbookers rely on their handwriting or journaling, it is still better to add something different to your scrapbook page every once in a while. Alphabet stickers are great for scrapbook page titles – they add that extra jazz. They are also pretty easy to use and not so expensive. There are a variety of font designs and colors available out there so you won’t have a hard time choosing the best alphabet stickers for your scrapbook kit collection.


Wood Veneers


Like stickers, adhesive wood veneers can add flow and movement to your scrapbook page. It can make certain areas and spots on your page pop! These scrapbook embellishments come in different shapes, sizes, and colors! Some wood veneers in various shapes like triangle, circle, square, rectangle, hearts, etc. There are also wood veneers that form words – from family and love to sweet and hugs. These wooden adhesive veneers will surely add dimension and texture to your scrapbook page.


Enamel Dots


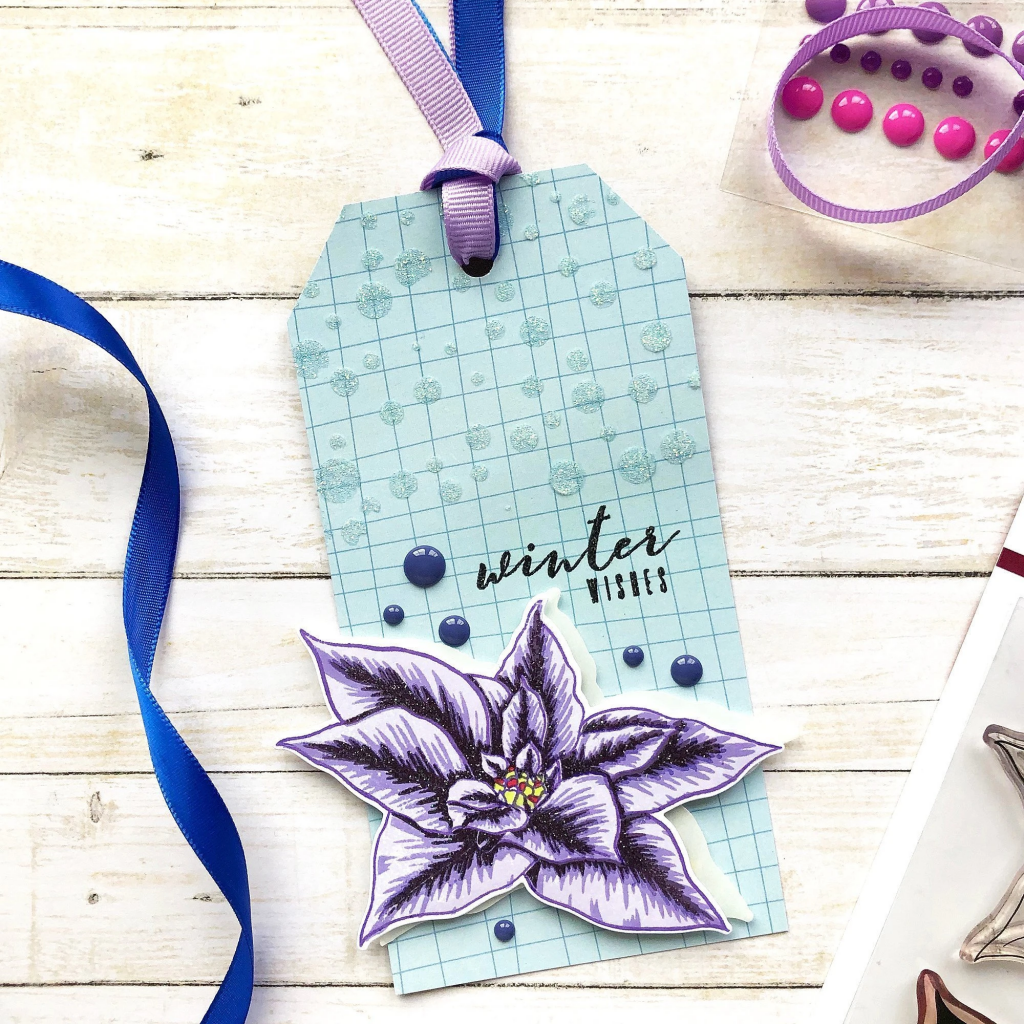
Never underestimate the power of enamel dots! They might be tiny but they do pack a punch! Adding a few enamel dots here and there will add interest to any scrapbook page. These colorful scrapbook embellishments usually come in different-sized circles, but there are other shapes like heart, diamond, triangle, etc. Enamel dots are must-haves in your scrapbook kit. They are so useful and versatile that you can even make them the focal point of your page! Don’t have alphabet stickers or sentiment stamps for your titles? Use enamel dots to spell out words! Want to add movement to your page? Try creating shapes using enamel dots! The creative possibilities are truly endless.


Now that you know which 5 scrapbook embellishments are essential, don’t waste any more time looking around. Grab these from your favorite online store and grow your scrapbook kit collection!

Important Things To Consider Before Finally Deciding On Your Embroidery Design And Pattern

Not all types of embroidery will be made in the same manner – there will be good ones and there will be bad ones as well. You may not be able to recognize a poorly made embroidery all by itself but if the same thing is kept beside a good quality one – that has been made and designed by Brisbane embroidery services, then only you’ll be to know the differences.

It’s always the small and little things that matter when planning to opt for your embroidery design which is why you need to find the aptest embroidery services to perform your work. The following are some of the most crucial factors that you need to consider before choosing your embroidery pattern or even machine embroidery designs.

The Factors To Learn Before Finally Deciding Upon Your Embroidery Style

1. The Overall Pricing

It should be remembered that the pricing of your embroidery design will depend upon the overall stitch count, the kind of colours you’ve chosen, the overall size of the design, whether the design is complex or not and so on.

If you plan to minimize the overall price that is being charged for your embroidery design, then the best option for you would be to reduce the number of colours that are associated with the design and also lowering the overall size of the design too. These are some of the factors on which the price varies greatly.

2. The Colour That You’re Choosing

Before you plan on going out for your first embroidery design, it should be noted that embroidery is more suitable for designs that have a separation between its colours clearly and there is the presence of solid colours (and not different colour variations). If the design has various colour shading and gradients, then it can be hard to reproduce that type of embroidery or embroidery patches – in its entirety.

You should also keep in mind the colour of the apparel on which you’re planning to get the embroidery as well. For instance, if the embroidery design colours are dark, then it will not look good on apparel whose colour is also dark as well. You need to choose contrasting colours if you want your design to be visible and look good as well. 

3. The Size Of The Embroidery Design

Different sizes of the embroidery design will provide separate results in the end. For example, if your embroidery design is around four inches or even less, then such design size will not be able to integrate any sort of complex designs in it. 

If you want your designs to have complex patterns, then your embroidery design size should be more than eight inches in overall size.

4. Using Of The Main Photograph As A Base Model For The Embroidery Design

Before you plan to provide your copy of the photographic design that you want to consider as the base model for the embroidery design, you need to ensure that the photography is of high-quality resolution.

It’ll not be possible to work with artworks or photographs that are low in resolution and the overall quality is less. In case you have such low-resolution photographs or artwork that you want to be considered for an embroidery design, then such artwork or photo will have to re-drawn so that colours and solid lines could be easily differentiated from one another and the task of embroidering becomes a lot easier as well. 

Moreover, ensure that your photograph or artwork doesn’t contain any distressed fine details or textures, as such details will get lost in the embroidery process.